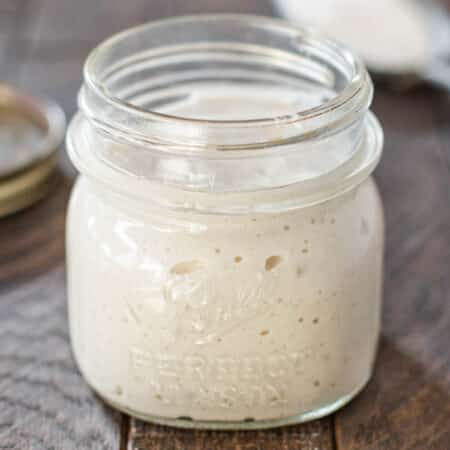
Making a Sourdough Starter
Servings 1 cup
Calories 217kcal
Ingredients
- 60 grams bread flour
- 60 grams filtered water
Instructions
- Day 1: Combine 60g bread flour and 60g filtered water in a clean glass jar. Stir until no dry flour remains. Scrape down the sides, loosely cover, and leave at room temperature for 24 hours.
- Day 2: Check for bubbles or other signs of activity, but don't feed yet. Loosely cover and leave at room temperature for another 24 hours.
- Day 3: Discard all but 60g of starter. Add 60g filtered water and 60g bread flour. Stir well, scrape down the sides, loosely cover, and mark the starting level with a rubber band.
- Days 4 and beyond: Every 24 hours, keep 60g starter and discard the rest. Feed with 60g filtered water and 60g bread flour. Continue daily until the starter reliably rises after feeding, develops lots of bubbles, and follows a predictable rise-and-fall pattern.
- Once established: Your starter is ready to use when it's consistently active, bubbly, and rising predictably after feedings. This may take a week, two weeks, or longer.
Notes
- Most starters take about 7–14 days to become reliably active, but some may take longer. Watch your starter, not the calendar.
- I use bread flour for both my starter and my sourdough bread. Whole wheat or rye flour can help give a sluggish starter a boost, but they're not necessary.
- Filtered water is best if your tap water is heavily chlorinated.
- A cool kitchen will slow fermentation. If needed, place your starter somewhere slightly warmer, like a turned-off oven with only the light on.
- A big rise during the first few days doesn't necessarily mean your starter is ready. It's also normal for that early activity to suddenly slow down. Keep feeding it.
- Read your starter, not the calendar. Look for consistent bubbles, rising, and a predictable rise-and-fall pattern instead.
- During the early stages, I don't save the discard for recipes. Once the starter is established, you can refrigerate your discard and save it for other uses.
- Keep your starter at room temperature and feed regularly if you bake often, or store it in the refrigerator if you only bake occasionally.
Nutrition
Serving: 1 cup | Calories: 217kcal | Carbohydrates: 44g | Protein: 7g | Fat: 1g | Saturated Fat: 0.1g | Polyunsaturated Fat: 0.4g | Monounsaturated Fat: 0.1g | Sodium: 4mg | Potassium: 60mg | Fiber: 1g | Sugar: 0.2g | Vitamin A: 1IU | Calcium: 11mg | Iron: 1mg